Pages

Friday, April 29, 2011

Miso Udon Stir-Fry


I wouldn't say we were huge miso lovers at this abode so I'm not sure why one of the first recipes bookmarked in Appetite for Reduction was a fairly heavily based miso one. I have thought long and hard about this and still have not come up with a satisfactory answer. Miso seems to be one of those flavours that I have grown to like rather than something that you try and can't get enough of from the first bite. 

There were quite a few ingredient substitutions made which was mainly to do with using up vegetables that were on hand as well as the addition of fried shallots as a garnish. I loved the combination of fried shallots and sesame seeds garnish in this recipe I have previously made from Veganomicon and thought it would work well here too.   

Surprisingly this stir-fry was devoured and enjoyed by all of us. Perhaps we are all coming around to miso.

Miso Udon Stir-Fry with Greens and Beans (Adapted from Appetite for Reduction)

270g packet dried udon noodles
1/3 cup white miso
1/2 cup hot water
1 tablespoon peanut oil
1 stalk broccoli, chopped into small florets
12 green beans, chopped into bite-sized pieces
6 cloves garlic, sliced thinly
4 spring onions, chopped
4 brussel sprouts, cut in half and then shredded
2 small carrots, julienned
1 x 425g tin adzuki beans, drained and rinsed
1 tablespoon toasted sesame seeds, for garnish
1 tablespoon fried shallots, for garnish
Sriracha hot sauce, for garnish

Bring a pot of water to the boil and cook the noodles according to the packet directions. Use 1/2 cup of the noodle water to mix with the miso in a small water. When the noodles are ready, drain and then rinse well in cold water to stop the noodles from cooking further.

Heat half of the oil in a wok. When the oil is smoking, stir-fry the broccoli and green beans for a couple of minutes, then remove from the wok.

Add the rest of the oil to wok. Stir-fry the garlic, spring onions, brussel sprout and carrots for a couple of minutes then stir through the adzuki beans. Add the udon noodles and miso-water mixture, return the broccoli and green beans to the wok and stir thoroughly until combined. Turn the heat to low.

Serve topped with toasted sesame seeds, fried shallots and sriracha sauce.  

Thursday, April 28, 2011

Mrs Myrtleberry is driving me nuts...


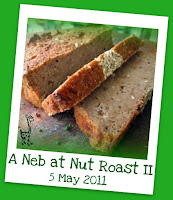
When Johanna announced she was holding a Nut Roast event, there was immediately a nut roast in my mind that I wanted to try for the occasion - Mrs Myrtleberry's Roast from World Vegetarian Classics by Celia Brooks Brown. What I didn't know at this stage was the number of attempts it was going to take me to transform this recipe into a vegan nut roast. 

The recipe takes it's name from the original creator, Mrs Myrtleberry a B&B owner in Devon, England and uses a mixture of nuts that are lightly toasted to bring out their flavour. The other main ingredients are chopped shallots, tomatoes, herbs, eggs and cheese.

My initial thought was that 3 eggs and 150g cheese wasn't going to be hard to substitute and as I didn't believe that the cheese would have much impact on the overall texture, I didn't bother using cheezly the first time. I used 125g silken tofu and a few tablespoons of nutritional yeast for my first attempt which failed miserably. I should correct myself and say that only the texture was a fail, as the taste was very nice and left-overs were enjoyed in sandwiches for days to come. This nut roast was baked for over an hour and still was not firm to the touch. My vegan substitutions were in need of some work!


After the first texture failure, I became more incensed about getting this right. The recipe was perused even more carefully. I realised that I had used tomato passata last time rather than a tin of tomatoes and wondered whether that had made the mixture too runny and led to my texture woes. Perhaps the loaf tin wasn't the right choice? Did I have too many other roasting vegetables competing for the heat of the oven? So much to consider...

For the second attempt I used ground flaxseed plus water instead of the silken tofu, and cheezly was included this time. Again the nut roast was baked for an hour and felt pretty firm by this time, however when it was time to slice it up, the middle of the roast was still not firm enough. It was interesting to note that the texture seemed to become firmer as the nut roast cooled down.


A couple of weeks slipped by but there was no way I was going to let this nut roast get the better of me. The second effort was much closer to a satisfactory result so I settled upon making it this way again with an additional filler to assist with soaking up the moisture. There was some cooked brown rice on hand so a cup was added to the mixture. I won't say it turned out perfectly, however it was a pleasing result after so many trials and tribulations. 

Nut roast sandwiches have become popular at home with all of this recent activity so this gives me incentive to keep making them and I'm sure there will be heaps of great new nut roast recipes to try from Johanna's event.


Mrs Myrtleberry's Roast (Adapted from World Vegetarian Classics)

50g cashews
50g almonds
50g walnuts
50g pecans
50g pine nuts
4 small shallots, chopped finely
2 cloves garlic, minced
1 cup cooked brown rice
150g grated cheezly
1 cup tomato passata
2 tablespoons ground flaxseed
1/2 teaspoon dried sage
2 tablespoons (or more) of fresh herbs of your choice (basil, mint, parsley)
salt and pepper, to taste  

Cook the nuts in batches in a dry frying pan. Heat over a medium flame, stirring gently until golden and fragrant. Remove to your food processor bowl and allow to cool. 

Preheat oven to 200C. Line a lamington tin with baking paper and grease with olive oil. Mix the ground flaxseed thoroughly with 6 tablespoons of water and allow to sit for a few minutes.

In a large bowl, mix thoroughly the ground nuts with the shallots, garlic, rice, cheezly, passata, flaxseed/water mixture, dried sage, fresh herbs and salt and pepper. Scoop the mixture into the prepared tin and bake for 1 hour or until firm and golden. Cool slightly, then turn out on to a serving plate and peel off baking paper. Serve with a rich tomato sauce or gravy.

Wednesday, April 27, 2011

Easter Baking

Easter has flown by! Plenty of baking was done although I took some much needed time out from the computer and have to catch up with posting now.

It began with another batch of Johanna's lovely hot cross buns...


And I even managed to put some crosses on top (without making a mess of it). 


Last week, I trialled making bread loaves using this recipe with the wholemeal variation and as it has been getting gobbled up so quickly, 3 loaves have been made since. Bread is always at it's best when it is still a bit warm from the oven. Due to the lack of preservatives it wouldn't have a very long shelf life, although that's no problem in this house. It does makes very nice toast when it's a day or two old.


The day before Easter holidays started, my postman dropped in a present I had been waiting on for a while - Appetite for Reduction by Isa Chandra Moskowitz. The timing could not have been better, a new cookbook to keep me entertained over the Easter break! 

I had already promised to make Cindy's famous sausage rolls for the troops so the first recipes trialled were a couple of side dishes - sauteed mushrooms and kasha (with a bit of dried tarragon instead of dill) plus steamed broccoli with easy breezy cheezy sauce. The kasha and mushrooms was nice but the cheezy sauce on the broccoli was sooo good. The remnants of the cheezy sauce also tasted great smothered on top of marmite on toast. My mind has been going crazy ever since, thinking of all the ways this wonderful sauce can be utilised.


I also made roasted cauliflower ricotta lasagna with home-made pasta from Appetite for Reduction which was nice but not spectacular. The roasted cauliflower ricotta sounded like it would be a good combination, however the lasagna just didn't turn out with as much flavour as I was hoping for. It had been a long time since the pasta machine was last used so this was a perfect time to dust it off. 


The format of Appetite for Reduction is fantastic. I love having the nutritional information of each meal available, plus there are good mix 'n' match options and loads of handy tips along the way. Some chapters initially grabbed me more than others which is probably due to the oncoming cold season. There are lots of salads that sound interesting but I don't think I'll feel like making them until next spring/summer, however there are plenty of soups, stews, curries, pastas, noodles, sauces and side dishes to keep me going until then.  

Thursday, April 21, 2011

Some more pot pies...


Pot pies!!! Cold drinks!!!

OK, it's pretty cheesy but that's how I announce dinner is ready when pot pies are on the menu. Anyone who has attended an AFL game would be familiar with the youngsters prowling up and down the aisles, spruiking "Hot pies, cold drinks".

Pot pies have become almost a weekly meal of late as they are always devoured by the boys. I just love the simplicity of making the filling, topping up the ramekins and dropping a lid on top. It's so much easier than fiddling around with the pastry in a pie dish. Although we have been eating lots of pot pies, I am yet to repeat a recipe and still have plenty more on my list to try.


TVP is something I rarely cook with, however I purchased a few packets some time ago and noticed they were nearing their best before dates. Rather than let it go to waste, I used some in pot pies inspired by Cindy's recipe with a few chopped mushrooms added to the mix. My only gripe was that I used too much soy and worchestershire sauce in the gravy so they turned out too be rather salty. The boys didn't seem to mind the salt factor, in fact the man was more concerned about them being too peppery (of which I added very little) as he has an extremely sensitive palate to pepper. Nonetheless they went straight to the top of his pot pie list and came second on my son's. 


These rankings were quickly surpassed by the next pot pies which did not surprise me in the least. Carla posted a roast vegetable pie recipe last year using the cheezy sauce from Veganomicon. I made this several times last winter as it was adored so much. I was slightly amused that with all this recent pot pie making, no-one had requested it. It had been in my mind to do for some time and when I declared that these were to be the next pot pies, there was genuine excitement all around. This recipe also works very well as pot pies so after my pot pie experiments are finished (if that's possible) I can see this one going onto a regular rotation over the colder months to come. 


Wednesday, April 20, 2011

Ethiopian Feast (Part 3)


How can I possibly describe how wonderful these curries/stews are? 

The flavours and aromas of Ethiopian food are so unique due to those two special ingredients that were prepared last weekend, Niter Kibbeh and Berbere. The amount of Niter Kibbeh that I used in two of the stews was halved from the recipes. This wasn't due to spice levels as it is the milder component, however I felt that 2 tablespoons of fat per stew was more than enough and this way half of my batch was left-over for another night. As the heat level of the berbere was yet to be determined, I erred on the side of caution and added teaspoons gradually until I was satisfied with the spiciness. 

I made three stews, none of which were particularly complex to put together. After all of the onions, garlic, ginger and vegies were prepped, I made the lentils, followed by the powdered chickpeas and finally the mixed vegies. It is interesting to note that the recipes all begin with an initial step of cooking the onion without any oil until it is softened and then adding the Niter Kibbeh. It feels a bit topsy-turvy when you are so accustomed to heating oil and then cooking onion in it. 

The lentil stew was from World Vegetarian Classics by Celia Brooks Brown, my source for all of the Ethiopian components and the curries/stews. It was the first time I made this one and I probably wouldn't bother with it again which is why I haven't posted the recipe. Unlike the other two, it did not contain any Niter Kibbeh or Berbere. It was nice and had a distinct flavour due to decent amounts of ginger and basil that were included however the other two stews were the stand-outs by a mile.

The stew of spiced powdered chickpeas is definitely the most impressive. For something that contains so little ingredients, it has the most amazing taste. The first time I attempted it years ago, I was shaking my head in disbelief, but was so excited with the outcome. The Niter Kibbeh is the dominant force although I did only use 1/4 of the stated amount of Berbere this time. The mixed vegetable stew is also wonderful and spicy and highly rated in our house.   


The left-overs were on the menu tonight. Although there was no left-over injera to enjoy them with, they were still lovely with some brown rice instead. I have never eaten out at an Ethiopian restaurant, it is something I am particularly interested in doing as I would love to try the injera and their authentic stews.  

Vegan Dad also seems quite enthused about Ethiopian cooking and has several recipes on his blog. I might have to give one of his stews a try next time for something different...

Ye'atakilt W'et (Spicy Mixed Vegetable Stew) (Adapted from World Vegetarian Classics)

1 large red onion, finely chopped
2 tablespoons Niter Kibbeh
2 garlic cloves, finely chopped
1 tablespoon Berbere
1 tablespoon paprika
100g green beans, cut into bite sized pieces
3 small carrots, cut into bite sized pieces
1/2 head cauliflower, cut into small florets
2 tomatoes, seeded and chopped
4 tablespoons tomato paste
500ml vegetable stock
salt and pepper
fresh parsley, finely chopped

Heat a large saucepan with a lid over a medium heat and add the onion (without any oil). Cook, stirring until soft. Add the niter kibbeh, garlic, berbere and paprika and cook for 2 minutes. Stir through the beans, carrots and cauliflower until well coated with the onion and spice mixture. Cover and cook for 5 minutes, stirring occasionally.

Add the tomatoes, tomato paste and stock. Bring to the boil, then reduce the heat and simmer uncovered, until the vegetables are tender. Season with salt and pepper and stir in the parsley.


Yeshiro We't (Stew of spiced powdered chickpeas) (Adapted from World Vegetarian Classics)

1 red onion, finely chopped
2 tablespoons Niter Kibbeh
4cm piece ginger, finely chopped or grated
2 garlic cloves, finely chopped
2 teaspoons Berbere
2 teaspoons nigella (black cumin, kaloonji) seeds 
500ml vegetable stock
1/4 cup besan (chickpea flour)
salt and pepper

Heat a saucepan over medium heat. Add the onion (without any oil) and stir-fry until soft and brown. Reduce the heat and add the niter kibbeh, ginger, garlic, berbere and nigella seeds. Cook, stirring constantly, until the garlic is golden. Add the stock and bring to the boil, then reduce the heat to a simmer.

Mix the chickpea flour with enough cold water to make a smooth, pourable paste. Gradually drizzle the chickpea paste into the simmering mixture ensuring that you keep stirring constantly to avoid lumps. Simmer for about 30 minutes, or until very thick. Season with salt and pepper.  

Monday, April 18, 2011

Ethiopian Feast (Part 2)

Total and utter deliciousness!!! That's the best way to sum up our Ethiopian meal but even that seems to understate how good it was. So different to other curries and the injera bread was fantastic. I had serious doubts that the bread was going to turn out as the mixture seemed quite thick initially. Over the course of three days of fermenting it thinned out a little.  

This is how it looked after one full day...


After the second day, there were more bubbles present as well as more water separating.


And here is a shot of one frying in the pan. As I don't own a huge non-stick frying pan, I made the injera smaller rather than larger which made them easier to handle. I won't lie and say every piece turned out perfectly as the temperature of the frying pan was too hot initially so a couple were a little burnt on the bottom. I was happy with an 80% success rate on my first attempt.


The recipe seemed to feed a lot of people so I halved it for the three of us in case I made a mess of it or it didn't keep well. In hindsight, I should have made the full recipe which is posted below as we have so many left-over curries. I'm not sure if I can restrain myself from the left-overs for 3 days in order to make another half batch of Injera. Next time a full batch of Injera will definitely be made.

Now I have given you the know-how on the Berbere spice mix, the Niter Kibbeh spiced butter and Injera, there is only thing left to talk about - the curries. Stay tuned...

Injera (Sourdough flatbread) (From World Vegetarian Classics)

300g (2 1/3 cups) strong white bread flour
100g (2/3 cup) wholemeal self-raising flour
7g dried yeast
625ml (2 1/2 cups) warm water
1/2 teaspoon bicarbonate of soda
1 teaspoon salt

Select a large ceramic, glass or plastic bowl, which will allow the batter enough room to rise. Combine the flours and yeast in the bowl. Stir in the warm water and mix to a fairly thin, smooth batter. Cover with a clean damp cloth and let the mixture sit for a full 3 days at room temperature, stirring once a day - it will bubble and rise.

When ready to cook the injera, stir in the bicarbonate of soda and salt into the mixture and leave to stand for 15 minutes. 

Heat a large non-stick frying pan over a medium heat until a drop of water bounces on the surface. Use a 1/2 cup measure to scoop the batter and pour into the hot pan, swirling quickly to coat the surface from the centre outwards - lots of little holes will form immediately. Cook until the surface of the pancake is dry; do no flip or allow to brown underneath - it should be soft and pliable. Remove to a warmed plate and cook the remaining Injera. 

Sunday, April 17, 2011

Ethiopian Feast (Part 1)

On Friday night whilst flicking through cookbooks I was inspired to have another go at making Ethiopian curries. It is probably close to 2 years since I last had a stab at some Ethiopian cuisine and it was so spicy, flavoursome and different to other curries that it was thoroughly enjoyed by all. I haven't bothered making injera bread previously but after reading recent restaurant reviews of Ethiopian restaurants I decided to give it a try this time.     

The injera dough is very simple to prepare, there is no kneading required and a quick mix results in a thick batter. The downside is that it takes 3 days of fermenting (with a quick stir every day) before it is ready for use. In the meantime there were some other vital Ethiopian staples that needed to be prepped like the fiery Berbere spice mix and Niter Kibbeh, a spiced clarified butter.

Some of my spices were almost running out and others not used as frequently were well past their best before dates, so I did a stock-up of fresh spices from my local Indian grocer. 


Armed with these goodies, I went about making the spice powder first and regretfully forgot to  take a photo as the whole spices were roasting away. The smell coming from the kitchen was amazing. After the roasted spices cool down, it's only a matter of grinding them with a few other ground spices and placing the mixture into an airtight container.


The clarified margarine is also fairly straight-forward. After the margarine has melted, it is simmered for 20 minutes along with onions, garlic, ginger and spices. My only issue was that I couldn't locate my cheesecloth or anything similar for straining the margarine. I resorted to carefully using coffee filter bags, however this needed to be done in a few batches as the bags broke a couple of times. Suffice to say, my clarified margarine has a few extra bits and pieces.  


Now that these two basics are out of the way and the injera dough has only one day to go, I'm really looking forward to dinner tomorrow night. There are 2 or possibly 3 curries that will be on the menu, mixed vegetable, powdered chickpeas and a lentil one if I have enough time. I'll follow up with some more Ethiopian recipes in a day or so!

Berbere (From World Vegetarian Classics)

2 teaspoons cumin seeds
8 cloves
1 teaspoon cardamom seeds (not pods, seeds from the pods only)
1/2 teaspoon black peppercorns
1 teaspoon fenugreek seeds
1 teaspoon coriander seeds
8 small red dried chillies (1 used 4 medium sized ones)
1/2 teaspoon ground ginger
1/4 teaspoon allspice
1/4 teaspoon turmeric
1 teaspoon salt
1/4 teaspoon cinnamon
3 tablespoons paprika

Toast the cumin seeds, cloves, cardamom, peppercorns, fenugreek, coriander seeds and chillies in a dry frying pan over a medium heat, shaking the pan frequently, until lightly coloured. Leave to cool, then grind in a spice grinder with the ginger, allspice, turmeric, salt, cinnamon and paprika until a fine powder forms. Store in an airtight container.

Niter Kibbeh (From World Vegetarian Classics)  

250g unsalted butter dairy-free margarine
1 small onion, finely chopped
1 garlic clove, finely chopped
1cm piece ginger, peeled and grated
1/2 teaspoon cardamom seeds 
1 cinnamon stick, about 7.5cm long
2 cloves
1/4 teaspoon freshly grated nutmeg
1/4 teaspoon fenugreek seeds
1/4 teaspoon turmeric
1/2 teaspoon dried basil

In a small saucepan, gradually melt the margarine and bring it to the boil. Add the onion, garlic, ginger, cardamom, cinnamon, cloves, nutmeg, fenugreek, turmeric and basil and reduce the heat to a simmer. Simmer over a very low heat, making sure there is no sign of burning, for about 20 minutes, or until the solids fall to the bottom.

Pour the liquid through a cheesecloth into a container. Discard solids. Leave to cool completely and store in the refrigerator for up to 2 months.  

Thursday, April 14, 2011

Drunken beans with seitan chorizo


The recipe for drunken beans with seitan chorizo jumped out at me the very first time I flicked through Viva Vegan. I'm not sure if it was name that grabbed me or the mouth watering description of the boozy beans but as soon as the chorizo recipe was deemed a success, this recipe was bookmarked to try.

That was several months ago now and every time I have set out to try this something has prevented me from giving it a go. The original recipe uses dried pinto beans which need to be soaked 8 hours or overnight which has caused a couple of problems. The first being that I haven't been able to source dried pinto beans in my area and when I made a trip to Casa Iberica to stock up on Latin American ingredients I stupidly purchased tinned pinto beans rather than dried. The other showstopper has purely been lack of organisation on my part in preparing dried beans ahead of time. 

I couldn't wait any longer so something had to be compromised. Tinned legumes and beans are something I have been cutting back on using recently so I opted to sub in some dried red kidney beans. After the initial soaking period, the beans are simmered for up to 2 hours with dried epazote, a mexican herb I was excited to find at Casa Iberica. This meal takes a fair bit of time from start to finish but there is a lot of down time to prepare other side dishes along the way.

As this was going to be a heavy meal that was going to be served with my favorite rice dish from the book - Cilantro Lime rice, I decided it was time to try something from the salads chapter to lighten it somewhat. I found a nice simple salad that suited what was in the fridge which was the Spinach-Avocado-Chile salad, the chile component being a part of the dressing.

This dinner was right up my alley but the boys found it a bit too spicy. Luckily I had skipped an ingredient in the drunken beans that I didn't have which was a couple of serrano chillies. The salad added a nice cooling touch as the chilli flavour in this was smoky rather than overly spicy. The beer wasn't really detectable on the night, however the flavour was a little more prominent the next day. Tequila was an additional ingredient in the recipe that I didn't have on hand so this was omitted.

Drunken Beans with Seitan Chorizo (Adapted from Viva Vegan)

2 cups dried red kidney beans
4 1/2 cups cold water
1 tablespoon dried epazote
1 tablespoon olive oil
1 onion, diced
1/2 quantity of the chorizo sausage recipe
1 1/2 teaspoons Mexican/Spanish oregano
2 teaspoons chilli powder
1 teaspoon cumin
1 x 400g tin diced tomatoes
1 red capsicum, sliced
1 teaspoon salt
375ml beer
1/2 large red onion, diced
1 tablespoon fresh coriander, chopped
2 tablespoons lime juice
2 jalapenos, diced finely

Place the kidney beans in a bowl and cover with water so that the beans are covered with at least 2 inches of water. Leave the beans to soak for 8 hours.

Drain the beans, rinse well, then place into a large pot with 4 1/2 cups of cold water and epazote. Bring to the boil, then reduce the heat and simmer for about 1 1/2 hours.

After the beans have been cooking for an hour, heat a tablespoon of olive oil in a large frying pan and cook the onion for about 5 minutes until translucent. Add the seitan chorizo and fry for 8 minutes, stirring frequently. Mix through the oregano, chilli powder, cumin, diced tomatoes, red capsicum and salt and cook for a further 5 minutes.

Remove about a cup of the bean cooking liquid and reserve then add the chorizo and tomato mixture to the pot, followed by the beer and stir to combine. Simmer for a further 45 minutes partially covered, adding more bean cooking liquid if required. Turn off the heat and allow to rest for 15 minutes before serving.

To prepare the garnish, mix together red onion, coriander, lime juice and jalpenos. Serve the drunken beans and chorizo with rice or tortillas topped with the garnish. 

Wednesday, April 13, 2011

Zucchini/Spinach Koftas


A while ago a promise was made to my family that the next Indian meal I made would feature koftas as they are the favourite type of Indian curries for my boys. My son had no hesitation in requesting zucchini koftas when he was presented with a few different options which didn't really surprise me as they have been highly requested for quite some time. Although I made the zucchini koftas a few weeks ago I never got around to posting about them.

In the summer of 2009/2010, I planted several zucchini plants in my garden and was totally overwhelmed by their success. They were growing faster than we could eat and give them away! After some time, we grew very tired of eating zucchini even though I was using them in so many different ways. Fritters, ratatouille, pasta sauces, quiches, okonomiyaki, stuffed zucchinis to name a few.

I needed to try something a bit different, maybe with some spices to keep our zucchini interest alive. That was when I found the zucchini kofta recipe on Johanna's blog and I loved the sound of it straight away.  So many kofta recipes require you to pre-fry or bake the kofta balls which adds extra time (and oil) to the process but with this one you simply had to drop the rolled balls straight into the gravy. This turned out to be the favourite zucchini recipe in our household so it was made numerous times until the zucchini season ended.

There are a few changes I have made along the way such as decreasing the turmeric quantity and increasing the tomatoes. The resulting gravy turns out to be a pinker colour rather than yellow and has a stronger tomato presence. I usually taste the curry before serving and if I find it is too mild (as this is not a hot curry), another teaspoon of garam masala is added. I also forgot to add lemon juice to the kofta mixture this time around but this didn't seem to affect the overall flavour. 

Curries are rather popular with the man's family and sometimes when there is a family gathering on we have a curry night. It was a while since I had brought koftas along and after flicking through a few recipes I settled upon a mixture of two recipes. My cookbook "The Food of India" has a spinach kofta with a yoghurt gravy which has previously been a success but even in my pre-vegan days I was never particularly fond of this gravy. So I decided to make the spinach kofta balls with the tomato gravy from the zucchini kofta recipe for something different. 


The spinach koftas in this recipe are usually fried, however my initial plan was to go against this and bake rather than fry. When the spinach mixture was rolled into balls the consistency seemed nice and firm so I crossed my fingers, hoped for the best and simply dropped them into the gravy just like the zucchini koftas. And I was very pleased that they held together nicely! Spinach is way higher up on my favoured vegie list than zucchini, so it's not surprising that I enjoyed this variation more.


We polished off the left-overs of spinach koftas and an eggplant side dish a few nights later. I also made some cheating samosas with Borg's puff pastry sheets and the filling slightly adapted from this recipe. My son declared this dinner to be one of his favourites - koftas + samosas = win!!!  

Spinach koftas with tomato gravy 
(Koftas adapted from The Food of India)
(Tomato gravy adapted from Green Gourmet Giraffe credited to Food and Fun)

Spinach Koftas

500g frozen spinach
1 cup besan (chickpea flour)
1 small red onion, finely diced
2 garlic cloves, crushed
1 teaspoon cumin
2 tablespoons coriander leaves

Tomato gravy
1 tablespoon olive oil
1 tablespoon cumin seeds
1 medium onion, chopped
4 cloves of garlic, chopped
1 cup tomato passata
3 tsp garam masala

1 teaspoon salt
1 cup soy milk
1/2 cup almonds, ground
2 cups water
chopped fresh coriander leaves, for garnish

Defrost the spinach in a microwave and press out as much water as possible. Place spinach in a bowl, add the besan, red onion, garlic, cumin and coriander and mix together until well combined. The mixture should be very thick, if necessary add some more besan.


Place onions and garlic and a little bit of water in a blender and process until a smooth paste is formed. 

Heat the olive oil in a large saucepan or pot and fry the cumin seeds for a minute or two until they become aromatic. Add the onion and garlic paste and cook for about 5 minutes. Stir the garam masala, tomato passata and salt into the onion mixture. Add soy milk gradually, stirring constantly. Slowly add the ground almonds and mix thoroughly into the gravy. Add 2 cups water, then bring to the boil, reduce the heat to low and simmer, covered for about 10 minutes.

While gravy is simmering, roll the spinach mixture into small balls keeping in mind that they expand a little when they cook in the gravy.

Place the koftas into the gravy, ensuring that they do not touch each other and increase the heat slightly. Cover and cook for 3-5 minutes. Then gently turn koftas over with a spoon. Cook for another 3-5 minutes. Serve with rice and garnish with fresh coriander.

Monday, April 11, 2011

Hot cross(less) buns


Reflecting on Easter brings back childhood memories of unwillingly being dragged along to countless drawn out church services. The one thing that always made it cheerier were the hot cross buns that used to be a standard offering from Easter Saturday onwards. Like most children I always looked forward to chocolate eggs on the Sunday, however it is hot cross buns that have remained my favourite part of Easter fare to this day. 

The last couple of years Easter has snuck up so quickly that I have missed the boat in attempting to make some hot cross buns, so I was determined that this wasn't going to be the case this year. With no plans on a Sunday afternoon and the housework more or less up to date, this was my perfect opportunity.

I saved a hot cross bun recipe a year ago when Ashley @ Eat me delicious posted it, however this recipe is credited back to Johanna @ Green Gourmet Giraffe. Only a couple of vegan substitutes were required, soy milk for the milk and dairy-free margarine for the butter. During the process of making the buns I decided to go against the norm and leave the crosses off. My thought process went something like this...     

OK, so it's time to make the cross mixture. Hmm, it's only flour and water... Why not leave them off, it's not going to affect the taste. Actually, yeah I will leave them off! I would probably make a mess of them and them will end up looking terrible anyway...

So that's how they came to be the buns that are pictured above. They tasted fantastic which was the most important part for me although they didn't seem complete without the crosses. Next time I make a batch, I'll have to push my rebellious anti-religious tendencies aside and make them the way they are supposed to be made.   

Johanna's recipe is very thorough and explanatory of the many processes involved in making the buns so I won't bother rewriting the recipe but I encourage anyone wanting to try a Hot Cross Buns recipe to give this one a go. I would also like to thank Johanna again for handing out a Stylish Blogger award to me. It was such a lovely surprise and very rewarding to receive this from a person whose blog I have admired and been inspired by for so long.  :D

Friday, April 8, 2011

Creamy Facon, Mushroom and Avocado Pasta


There was a definite plan when I set out to make this pasta sauce which was to as closely as possible replicate a sauce that my mum made up sometime during my teens. Chicken, bacon, cream and cheese were all components of the original recipe, so there was quite a bit of replacing to do.

The chicken never really brought a lot to the sauce, it was more about the combination of the chicken and the bacon with the latter being the predominant flavour. So I decided to concentrate on the bacon component and fortunately there was a batch of facon on hand from the recipe that was recently blogged about by Johanna @ Green Gourmet Giraffe via Sarah @ The Ordinary Vegetarian and originally by No Meat Athlete. It was sampled for the first time in this meal and the unanimous household agreement is that we all prefer tofu bacon. This facon had a great flavour but I thought that the texture wasn't as good.   

I decided against using dairy replacement products like Tofutti or cheezly as I wanted the sauce to be full of fresh non-processed ingredients. Instead, I opted to make a creamy cheesy sauce out of cashews, soy milk, nutritional yeast, lemon juice and miso. 

As there was such a definite picture in my mind about how the meal should taste I judged it rather harshly. It was actually quite a nice meal just not close enough to what I was aiming to replicate. It has given me some ideas on what to do differently in order to get it closer next time and tofu bacon will definitely be included!

Creamy Facon, Mushroom and Avocado Pasta

Olive oil spray
12 slices facon

4 spring onions, sliced
2 garlic cloves, crushed
150g button mushrooms, sliced
2 medium tomatoes, diced
1/2 cup cashews
3/4 cup soy milk
1/4 cup nutritional yeast

1/2 teaspoon salt
1/2 teaspoon smoked paprika
2 tablespoons lemon juice
1 teaspoon white miso
salt and pepper, to taste
1 avocado, chopped

fresh parsley, for garnish
250g linguine

Place cashews, soy milk, nutritional yeast, salt, smoked paprika, lemon juice and miso in a blender and process until a very smooth sauce forms.

Spray large saucepan with olive oil spray and fry facon slices over medium heat for a couple of minutes on each side until browned. Remove the facon and chop into bite sized pieces.

Place linguine in a bot of boiling water. 

Spray the saucepan used to cook the facon with more olive oil spray. Fry the spring onions and garlic over medium heat for a minute then add the mushrooms and cook until softened. Push the mushrooms to one side of the saucepan, add the tomatoes to the other side and cook for a couple of minutes. When the tomatoes are breaking down and becoming soft, mix the mushrooms and tomatoes together then pour in the blender mixture and facon and stir through. Season with salt and pepper.

Drain the linguine when cooked, then add it to the pasta sauce. Stir until thoroughly combined. Serve topped with chopped avocado and parsley.   
  

Monday, April 4, 2011

Pot pie experiments


Pies and pastries are something I love to play around with although the vast majority of the time I freely admit that I cheat and use ready-made puff pastry sheets. When we moved back in after renovations, one of the few things I purchased for the kitchen were some ramekins as pot pies were high on my to-do list.

When choosing recipes for my Planet VeGMeL week I found a couple of pot pie recipes that almost made my selections and have been made since. The first one I tried was sweet potato and corn pot pies with adobo sauce from Where's the Beef (originally from 101 Cookbooks) which weren't really my cup of tea although I'm not really a sweet potato and corn kinda gal anyway. The next ones to get a try were tofu, mushroom and spinach pot pies from Vegan about town. These were a lot more down my alley and although I loved the combination of the tofu, mushroom and spinach, the gravy was not thick and strongly flavoured enough to totally win me over.

My next trial was using the tofu, spinach and mushroom combination again substituting the sauce/gravy from the cauliflower and mushroom pot pie with black olive crust recipe in Veganomicon. When the sauce was almost ready, I had a taste and wasn't pleased. There was a distinct floury taste and the dried thyme was a tad overpowering. I can't recall what was hastily added in an attempt to make these more appealing but I certainly wasn't going to stick to the recipe. They turned out to be passable in the end but not something I would repeat. 

As the Vegan about town recipe was my favorite of the three I decided to remake it with slight adaptations. They turned out to be the best so far as the gravy was thick and delicious and had a lovely flavour. They will be repeated this way again, however I would still like to experiment with more pot pie fillings...


Tofu, mushroom and spinach pot pies (Adapted from Vegan about town)

1 tablespoon olive oil
1 leek, finely chopped
2 garlic cloves, minced
1/2 teaspoon dried basil
1/2 teaspoon dried oregano
1/2 teaspoon dried majoram
1 teaspoon smoked paprika
250g firm tofu, pressed and cut into small cubes
1 medium tomato, finely chopped
4 large portobello mushrooms, chopped
1 tablespoon soy sauce
1 tablespoon gravy powder
1/2 cup water
100g baby spinach leaves
salt and pepper, to taste
1 puff pastry sheet
soy milk, for brushing
sesame seeds

Preheat oven to 200C. Heat olive oil in a medium saucepan and fry the leek until softened. Add the garlic and stir for a minute, then stir through the dried basil, oregano, majoram and smoked paprika. 

Add the tofu cubes and mix gently until well covered. Stir through the tomatoes and mushrooms and cook for about 10 minutes until the mushrooms have softened and begin to release their juices. Mix the gravy powder with water until it becomes a smooth paste and add the paste to the saucepan along with the soy sauce. Stir continuously until the gravy thickens then add the spinach leaves and cook until wilted. If the gravy is too thick, add a little more water. Season with salt and pepper.

Spoon mixture into 4 ramekins until each one is 3/4 full. Place each ramekin on the puff pastry sheet and cut out a circle of dough around the base. Cover the mixture in each ramekin with a puff pastry circle, then brush with soy milk and sprinkle with sesame seeds. Bake for about 20 minutes or until the pastry has browned. 

Saturday, April 2, 2011

Creamy cauliflower and tofu bacon soup


Earlier this week, I was excited to find some cauliflowers that were a little over $2 so I bought one and was sorry later that I didn't purchase a second one. It was used up straight away in an old favorite at home, Red and White Cauliflower bake from Vegan Yum Yum

A creamy cauliflower soup was something I had been wanting a make for a while and as there was a bit of tofu bacon leftover from the calzones, I thought this would be a perfect finishing touch to the soup. Another cauliflower had to be sourced for the job and unfortunately not at the same price. The soup was made up as I went along and it turned out to be a big hit. The flavour that the tofu bacon brought to it was fantastic and next time a dash of smoked paprika could also be on the cards.

Creamy cauliflower and tofu bacon soup

1 tablespoon olive oil
1 leek, chopped finely
2 cloves minced garlic
3 cups vegetable stock
1 head cauliflower, cut into florets
6 slices tofu bacon
2 tablespoons tofutti cream cheese
1 tablespoon nutritional yeast
salt and pepper, to taste
fresh parsley, for garnish

Heat olive oil in a large saucepan and saute the leeks until softened. Add the garlic and cook for a minute then mix through vegetable stock and cauliflower florets. Bring to the boil then reduce the heat and simmer, covered for 15-20 minutes until the cauliflower is tender. 

Place leeks, garlic, cauliflower and stock in a blender and process until very smooth. Return to the cooking saucepan, stir though 4 slices of chopped tofu bacon, cream cheese, nutritional yeast and salt and pepper to taste. Allow to heat through.

Microwave the remaining 2 slices of chopped tofu bacon for a minute. Spoon the soup into serving bowls and garnish with tofu bacon, parsley and pepper. 

Calzones


On Friday I had a huge urge to make calzones which was probably due to reading Danni's post earlier this week. I knew exactly what I wanted to put inside them and settled upon one of the few pizza base recipes I rotate between. Tofu bacon was to be an ingredient and the recipe I normally use was nowhere to be found, so I had a look and found this one which had a few extra ingredients like ketchup, sugar and nutritional yeast.

The pizza base is a recipe my mother-in-law passed on to me which is a Stefano De Pieri one. It makes 2 large pizzas, or 3-4 decent sized calzones. The beauty of the recipe is that you don't have to allow 1 hour for the dough to double in size, it only requires 10 minutes of resting after the initial knead. When used as a pizza base it turns out quite thin and crispy.

The calzones were filled with a layer of tomato pizza sauce (store bought) mixed with basil pesto and a combination of onion, chopped tofu bacon, spinach, mushrooms, sun-dried tomatoes, olives and cheezly. The tofu bacon was perfect in the calzones, it gave them a wonderful smoky flavour and everyone thoroughly enjoyed them which can be a rarity. I will definitely be making them this way again!

Pizza dough (Stefano de Pieri recipe)

500g flour (I use pizza flour)
20g salt
10g dried yeast
350ml lukewarm water
2 tablespoons olive oil (I forgot to add it this time!)

Mix all ingredients for the dough in a bowl and knead for 7 to 10 minutes. Rest for 10 minutes then roll out to the desired size.