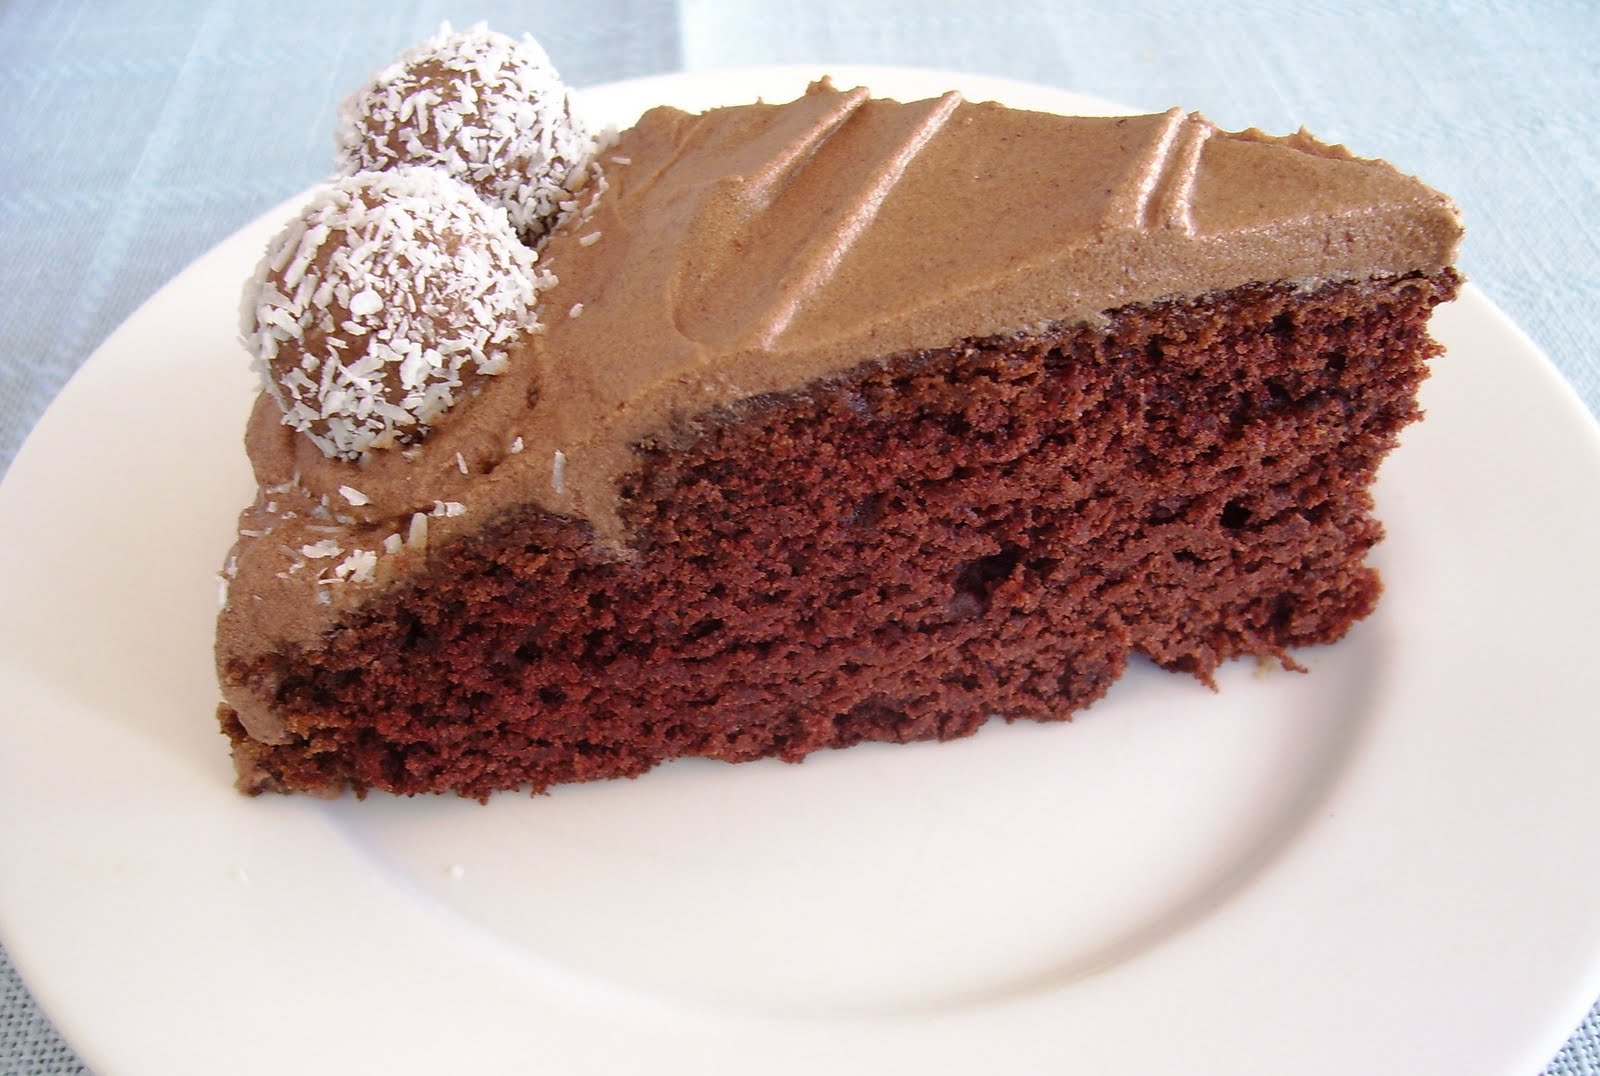
Showing posts with label Chocolate. Show all posts
Saturday, September 14, 2013
Vegan MoFo Day 14 - Sweet Saturdays - Choc-banana cheesecake slice
Several weeks ago I received an email from the man containing a link to a recipe - this was a total shock as I don't think he hasn't ever sent me a recipe via email before. His food requests usually come verbally and are repeats that he loves. Prior to looking at the recipe I decided that I would come through with the goods regardless of how I felt about making it. After clicking on the link I was excited that the recipe was for a chocolate banana cheesecake slice as I've never made a cheesecake, vegan or otherwise, in my life before.
One thing that was unusual about this recipe (to me anyway) was that the bananas were cooked in the oven while the base was being cooked. Apparently this is to intensify the flavour of the bananas yet we thought the banana was rather subtle in the slice so I'm not so sure about this theory. The cooked bananas were totally black on the outside after being roasted yet the banana flash within was still it's usual colour and bit softer in texture.
The slice was a big success with everyone at home, myself included, which means that it wasn't overly sweet (in case you are new to my blog, I don't have a very sweet tooth). I was requested to use Sweet William dairy-free chocolate rather than dark chocolate that was stated in the recipe which made the slice slightly less rich than it would have been with a dark chocolate. It was intended to be topped with chopped roasted almonds which isn't the most popular topping choice with my fellows so we all agreed that strawberries were an equally good option. This recipe is a keeper and one that definitely will be seen around here again.
Choc-banana cheesecake slice (Adapted from Frank Camorra's recipe on goodfood.com.au)
Anzac biscuit base
100g plain flour
90g brown sugar
60g rolled oats
50g desiccated coconut
1 teaspoon sea salt
80g dairy-free margarine
20g golden syrup
2/3 teaspoon bicarbonate of soda
Topping
2 bananas
250g vegan chocolate (I used Sweet William dairy-free, use dark chocolate if you prefer)
400g tofutti better than cream cheese
150g brown sugar
A punnet of strawberries, cut into halves
Icing sugar to dust
Preheat oven to 180C. Line a 20cm square dish with baking paper, allowing the paper to come up the sides then grease lightly with some margarine or olive oil spray.
In a large bowl mix together the flour, sugar, oats, coconut and salt. Place the dairy-free margarine and golden syrup in a small saucepan and heat gently until the margarine has melted. Add the bicarbonate of soda which will make the mixture foamy, then remove from the heat. Stir the contents of the saucepan into the bowl containing the dry ingredients thoroughly then press this mixture into the lined dish. Bake for about 15 minutes until golden and crisp.
Cook the bananas in the oven at the same time as the Anzac base, then remove and allow them to cool down. Peel the bananas and place them into a food processor along with cream cheese and process until the mixture is smooth. Add sugar and continue processing until smooth, scraping down the sides a few times to incorporate all of the ingredients. Melt the chocolate in a microwave or in a heatproof bowl, placed over simmering water, stirring occasionally. Add the melted chocolate to the food processor and scrape down the sides so it mixes evenly.
Spread this onto the cooled biscuit base and chill in the fridge for at least 4 hours. After the slice has set, use the baking paper to lift it out of the dish. Cut the slice into square pieces, top each piece with a halved strawberry and dust lightly with icing sugar. Store in a covered container in the refrigerator.
Monday, June 4, 2012
Chocolate chip cookies
Chocolate chip cookies were my favourite biscuits when I was growing up. They were so simple to bake and I used to love pinching as many chocolate chips as possible without being caught when my mothers back was turned. A few weeks ago when I had a craving for some bikkies, I pulled out my copy of The Joy of Vegan Baking and gave the chocolate chip cookie recipe a try.
It was the first recipe I had made from this cookbook that I've been unsatisfied with and my main gripe was the cookies were way too oily. I didn't want to give up on finding a perfect chocolate chip cookie recipe and remembered that I had scribbled down the one from my childhood during a phone conversation with my mum many years ago. When I tracked it down amongst my recipe clippings I suspected that a vegan adaptation of this recipe would work out to my liking.
It seemed like an easy recipe to veganise by substituting dairy free margarine for butter and using an egg replacer yet it wasn't all smooth sailing. After mixing in the flour, the dough seemed too firm so I quickly added in a bit of soy milk to rectify the situation. The recipe has been written with the soy milk added earlier as that is how I will make it next time around.
The young man is a big fan of chocolate chip cookies too which isn't surprising as he has such a sweet tooth. He preferred this version over the ones from the Joy of Vegan Baking so I'll be sticking with it in the future. I'm not 100% certain where the original recipe came from although I am fairly sure it was from a Women's Weekly cookbook, most likely the Beautiful Biscuits volume.
Chocolate chip cookies (Probably adapted from Women's Weekly Beautiful Biscuits)
Makes 20-24
1/2 cup raw sugar
1/2 cup dark brown sugar
125g dairy free margarine
1 egg replacer (I used Orgran)
1 teaspoon vanilla essense
1/4 cup soy milk
1/2 teaspoon bicarbonate of soda
1/2 teaspoon salt
1 3/4 cups plain flour
3/4 cup vegan chocolate chips (I used Sweet William brand)
olive oil spray
Preheat oven to 180C.
Cream the sugars together with the dairy free margarine in a large bowl. Prepare the egg replacer according to the package directions in a small bowl then pour this into the large bowl. Drizzle in the vanilla essense and soy milk and beat until combined. Add the bicarb of soda, salt and plain flour and beat until combined. Fold through the chocolate chips.
Prepare a large baking tray by lining it with baking paper and spraying lightly with olive oil. Take heaped dessert spoons of the mixture, roll them into balls and place onto the baking tray. Allow ample room for them to spread. Bake in the oven for 12 minutes or until golden. Remove the tray from the oven and allow the cookies to sit for a couple of minutes before transferring to a wire rack to cool completely. Store in an airtight container.
Monday, February 27, 2012
Green beans, tofu and chocolate truffles
Over the past week or so, I have enjoyed revisiting a few older recipes. The boys love it when I go through this phase as I always give them the chance to request meals that they cherish. My son (who shall be known as "the young man" from this point forward, thanks Cindy) surprised me with a request for a green bean and tomato side dish we all used to love but I have not made in recent years.
We watched Jamie Oliver make this side dish of beans and tomatoes on one of his TV shows a long time ago and were intrigued with the combination of these simple ingredients. When I tried the recipe, it became a household favourite that remained on regular rotation for many years. Jamie didn't include any herbs in his recipe and somewhere along the way I decided that I liked it more with some fresh basil which is how I make it these days. It is a fairly quick side to prepare with the only downfall being that it uses more than one pot.
After deciding that I would appease the young man further by serving mashed potatoes with the beans and tomatoes, I wanted to include a bit of protein to round out the meal. I purchased a grill pan towards the end of last year on the spur of the moment as I had been thinking about buying one and found one on sale. It has been a fabulous tool for making tofu bacon but I hadn't put it to the tofu steak grilling test yet.
It took a while to decide on a marinade for the tofu as I wanted to use one with lighter flavours rather than something that would be too overpowering or spicy. After going through several cookbooks, I finally settled on making a teriyaki marinade from Vegan Planet. The man and young man can either love or hate tofu so they eyed their steaks off with initial scepticism but after tasting it they declared that the tofu was excellent as was the rest of the meal.
Valentine's Day is not usually a celebratory event on the calendar in our house but this year we cheated and had an indulgence on some delicious assorted truffles. It was purely because I was the lucky winner of this adorable box of Sjaark's vegan chocolate truffles thanks to Mandee of Cupcake Kitteh. If you would like the details of some online stores where a range of Sjaark's chocolates can be ordered from, head over to this post at Mandee's blog.
Teriyaki pan-grilled tofu (Adapted from Vegan Planet)
1/4 cup soy sauce
1/4 cup orange juice
2 tablespoons sesame oil
2 tablespoons rice wine vinegar
1 1/2 tablespoons dark brown sugar
2 cloves garlic, finely chopped
1 teaspoon ginger, finely chopped
350g firm tofu, drained and pressed
Whisk together the soy sauce, orange juice, sesame oil, rice wine vinegar, brown sugar, garlic and ginger. Cut the tofu into 3 thick slices, place in a shallow dish and cover with the marinade. Allow the tofu to sit for about an hour, flipping the slices over after about 30 minutes.
Heat a grill pan and spray lightly with olive oil. Cook the tofu for about 3 minutes on each side or until slightly browned on each side.
Green beans with tomatoes (Adapted from Jamie Oliver)
250g green beans, chopped into bite sized pieces
1 tablespoon olive oil
2 cloves garlic, finely chopped
400g fresh tomatoes, chopped or 1 x 400g tin diced tomatoes
10-12 fresh basil leaves, finely chopped
salt and pepper, to taste
Place the beans in a saucepan with some salt and cover with water. Bring to the boil, then simmer for about 7 minutes or until the beans are tender. Drain in a colander and set aside.
Heat the olive oil in a large frying pan and add the garlic. Fry for about 30 seconds or until the garlic is sizzling, then stir through the tomatoes. Cook for 15 minutes, the tomatoes should be completely soft and broken down after this time. Stir through the green beans, basil and season with salt and pepper to taste.
Monday, January 9, 2012
Peppermint slice and Christmas baking
Happy New Year! It wasn't my intention to have such a long break between posts. Time seems to slip by so quickly when you are on a break from full-time work and enjoying spending time with your family. My computer was packed away for most of this period so I ended up taking a break from my blog as well as keeping up with the many other blogs that I read regularly. It was back to work for me today so now it's back to blogging!
Christmas feels like a long time ago but I wanted to share an indulgent slice that originated from an aunt when I was growing up. It was insanely popular amongst the youngsters as well as the adults and I have distinct memories of trying to stuff as many pieces into my belly as possible without making myself physically ill. It was a fine line and often my cousins, siblings and I would just wait another 10 minutes or so before attempting another piece.
The original ingredients for the slice were not healthy in the slightest; condensed milk, chocolate ripple biscuits, butter and Cadbury's peppermint chocolate. I was pleased that by using soy condensed milk, removing the butter and substituting dark mint chocolate in a lesser quantity, I was able to reproduce this childhood favourite. The man and son were delighted that the consistency wasn't perfect in my trial run as it meant they had a whole batch for themselves to indulge on!
I mentioned my plan to make arancini for our Christmas Eve dinner with my family from a batch of cauliflower risotto but in my baking frenzy I didn't take any photos. They turned out great with some sun-dried tomatoes, olives and a small cube of cheezly stuffed inside. I shaped them as cones, dunked them in soy milk, then rolled them in corn flake crumbs and baked them in the oven sprayed with olive oil. I also took half of the peppermint slice, jaffa balls and a salad that I wasn't overly happy with.
For Christmas brunch with the man's family I whipped up a batch of socca from Terry Hope Romero's recipe testing which were a bit tedious to churn out for a large number of people. It didn't really matter as everyone enjoyed them and there were also jaffa balls and peppermint slice to be devoured.
For our formal Boxing Day lunch with the man's family, I made Imam Bayildi for our main meal item which was nice although it didn't impress me as much as when I first made it during Vegan MoFo. I merged a couple of different hummus recipes from Appetite from Reduction and baked some pita bread to go with it. These were both a big hit! A Mediterranean pasta salad was my other contribution which I would like to tweak a little in the future.
Finally, I would like to share my most treasured present from this year. I was extremely delighted to unwrap this apron and oven mitts from my son. He chose it on his own and knew that I would love the chillies on it! Aprons have never been my thing but this one is getting put to good use because I love it so much.
Peppermint slice (Adapted from an old family recipe)
2 x 250g packets Arnott's Chocolate Ripple biscuits
1 x 330g tin Soymilke condensed milk
1 x 100g mint flavoured dark chocolate (72% cacao)
dessicated coconut, for topping
Place the biscuits in a food processor and pulse until they become a fine powder. Transfer the biscuit powder to a large bowl.
In a small saucepan combine the condensed milk and chocolate, heat on medium-low until the chocolate has melted, stirring occasionally. Pour the condensed milk and chocolate mixture into the bowl containing the biscuit powder and mix thoroughly until well combined.
Press the mixture into a 28 x 18 cm tin lined with baking paper, sprinkle with coconut and place it in the freezer for 30 minutes - 1 hour to allow it to set. Remove the slice from the tin and cut into small pieces. Store in the refrigerator in a sealed container.
Monday, October 10, 2011
Vegan MoFo - J is for Jaffa Balls
Jaffa balls are more like chocolate-orange flavoured truffles than the lollies I used to eat called jaffas. Jaffas are a chocolate-orange centred sweet with a crunchy shell rather than a coconut coating but it was the flavours in my balls that reminded me of jaffas so that's what I named them.
My venture into making vegan chocolate balls began when looking up an old rum ball recipe for my husband and son. The recipe only required one substitution, soy condensed milk for the regular condensed milk. After churning out a few batches, I decided to replace the rum and vanilla essense with some peppermint essense which resulted in delicious choc-mint balls. And after that jaffa balls followed...
The mixture is a cinch to put together with the help of a food processor to pulverise the biscuits. The biscuits in my recipes are a brand that is available in Australia which doesn't contain any animal products. Any type of plain sweet vegan biscuit could be used in their place. After combining the ingredients, it's worthwhile to put the mixing bowl in the refrigerator for at least 30 minutes. This firms up the mixture which makes rolling the balls a smoother process with not as much ending up on your hands.
Click here to see my A - Z of Vegan MoFo posts.
Thursday, June 30, 2011
Refried beans and a cake with balls
A cake with balls??? No, this isn't a typo in the title of this post, as you can see this cake does have balls. I
felt it was necessary to put this photo at the top of the post to prove
that I wasn't being rude. The title popped into my head and gave
me a chuckle so I decided to stick with it.
It was the man's birthday earlier this week and due to his infatuation with my rum balls, choc-mint balls and jaffa balls, I had an idea a while ago to bake him a chocolate cake and adorn it with chocolately balls of different varieties. I decided to try the chocolate cake and frosting from The Joy of Vegan Baking; these recipes are detailed in the samples on the author Colleen Patrick Gordeau's website.
This cake was lovely and moist although I think the man would have been even more impressed if he was presented with one enormous jaffa or choc-mint ball!
As we are going out for dinner on the weekend with family, the man was happy to dine at home on his birthday night so I allowed him to choose whatever he would like to eat. It was no surprise to me that he selected Mexican as the cuisine although I wasn't expecting refried beans to be his request.
Naturally I decided to use my beloved Viva Vegan for the recipes and selected the standard refried beans, cilantro-lime rice, cashew crema, guacamole and winter salsa. The winter salsa uses tinned tomatoes and is a variation on the fresh tomato salsa recipe which I hadn't noticed before. Terry's explanation for this recipe variation sums up how I feel about tomatoes right now. Every time I stroll past tomatoes at the fruit & veg shop or supermarket I feel disgusted with the price and disappointed with the lack of quality so I keep on walking.
Once again, it was another successful Mexican night thanks to Viva Vegan and the man was happy with his choice. As I am such a thoughtful wife, I also made something special for dinner the night before his big day so he could have the leftovers for a tasty birthday lunch. This will have to wait until next post. For now, I will leave you with this easy peasy but tasty tomato salsa that works so well when you don't have any fresh tomatoes on hand.
1 x 400g tin diced tomatoes
10 slices jalapeno peppers, diced
1 shallot, diced
2 tablespoons lime juice
2 tablespoons chopped coriander leaves
1/4 teaspoon salt
Drain some of the liquid from the tinned tomatoes and place them into a bowl. Stir through the other ingredients and refrigerate until ready to serve.
Labels:
Beans,
Chocolate,
Joy of Vegan Baking,
Mexican,
Nuts,
Rice,
Sweets,
Viva Vegan
Tuesday, May 24, 2011
Chocolate date slice
A few years ago, the man requested a chocolate date slice recipe from his mum as it was something that he enjoyed in his childhood. At that time, he used to bake the odd cake every now and again but I don't recall him ever making this slice. It had been filed away with other recipes that I flick through occasionally but it didn't really catch my eye until recently.
For quite a while I turned my back on baking cakes and other sweet things. I think it began after successive years of birthday cake failures which always resulted in a dash to the nearest bakery to save my butt. The stress involved with these encounters was more than enough to put me off for a while, however it also totally killed my confidence in this department. I developed a mindset that I wasn't able to bake cakes anymore and went on for many years without even trying.
A brand new kitchen and inspiration from blogs was exactly what I needed to get back into the swing of things. This year has seen me produce cakes, muffins, rum balls, choc-mint balls, jaffa balls and even a couple of batches of hot cross buns. Cooking meals still fulfills me a lot more than baking but I'm pleased that this monkey is off my back now.
Now for this recipe which is a fairly simple one. There were only a couple of non-vegan ingredients in the original recipe which were butter and one egg. These were replaced with nuttelex and flaxseed/water mixture. The only issue was when the flaxseed/water mixture was added to the lukewarm water with dates and nuttelex it didn't mix in smoothly and was rather gloopy. Next time I would add the flaxseed in with the walnuts or use a commercial egg replacer product like Orgran instead. Despite this hiccup the slice turned out just fine.
The man seemed quite pleased with his childhood slice although he isn't anywhere near as harsh a judge with sweets as he can be with other meals. I find it has more of a cake-like texture than other slices I have eaten previously. It is a very nice snack and I'm sure it will be baked again in the future.
Chocolate Date Slice
(adapted from Dollar Cook Book #2 published by Herald Sun circa 1970's)
1 cup chopped dates
1 cup water
1/2 cup dairy-free margarine
1 cup raw sugar
1 tablespoon ground flaxseed mixed with 3 tablespoons water
1 3/4 cup plain flour
1/4 teaspoon salt
1/2 teaspoon bicarb soda
1 teaspoon baking powder
1 teaspoon cinnamon
2 tablespoons cocoa
1/2 cup chopped walnuts
Preheat oven to 180C.
Place dates and water into a small saucepan and bring to the boil. Remove from the heat and add the margarine. Allow to cool to luke-warm then stir in the sugar and flaxseed. (I would add the flaxseed mixture in with the walnuts next time).
Sift the dry ingredients into a large bowl and mix through the dates, water and margarine. Stir in the chopped walnuts.
Spread into a 30cm x 20cm lamington tin lined with baking paper and cook for about 20 minutes.
Top with chocolate icing and sprinkle with coconut.
Tuesday, May 10, 2011
Jaffa Balls
Without intending to be overly monotonous, I wanted to share my latest rendition of the old traditional rum ball recipe, jaffa balls.
My baking of sweet things has been solely limited to chocolatey balls in recent times, as they seem to be a growing obsession with the man and son. As soon as a batch has been scoffed, I am under constant pressure to produce more (thankfully they are a cinch to throw together). If the batch runs out mid week and there is no soymilke condensed milk in the pantry, my campers are not happy at all as they have to wait until at least Saturday for their fix when I can make that next trip to the health food store.
Choc-mint balls have been a remarkable success and since they were introduced, left the standard old rum balls for dead. It led me to pondering about other types of flavours that could be used in these balls. Chocolate and peppermint has always been a favoured combination since my childhood, I would always opt for a choc-mint sweet over straight chocolate any day of the week. Not far behind would have to be chocolate and orange. Terry's chocolate orange balls and jaffas are yummy treats that immediately spring to mind from that genre.
And so with yet another single ingredient substitution, jaffa balls were born! A simple change from peppermint to orange essense gave these balls exactly the orangey touch they needed. Of course, they were declared to be the new favourites although I will be interested to see if they are still living up to their current hype a few batches down the track!
Jaffa balls
250g packet Arnott's Nice biscuits
3 tablespoons cocoa
1/2 cup desiccated coconut
330g can Soymilke soy condensed milk
2 teaspoons Maharajah's Choice orange essense
Extra desiccated coconut, for coating
Process biscuits in a food processor until they become a fine powder. Add the cocoa and 1/2 cup coconut to the food processor and pulse a few times. Transfer mixture to a bowl then add the soy condensed milk and orange essense. Mix together until everything is well combined.
Place mixture in refrigerator for about 30 minutes to give it a firmer texture which makes it easier to roll the balls. If the mixture is too soft, it gets very sticky and difficult to roll properly and the balls will not hold their shape.
Put the extra coconut into a bowl. Roll spoonfuls of mixture into balls with your hands, and then coat in coconut. Store in an airtight container in the refrigerator.
Saturday, April 2, 2011
Choc-mint balls
After being pestered to make more rum balls for ages despite there being a distinct lack of rum in the house, I had a moment of brilliance. Well I may have to give the man a bit of credit if my memory serves me right as he was the one that suggested I make choc-mint balls instead. By substituting a bit of peppermint essense in for the rum these old favorites took on a totally different flavour. I missed out on a photo the first time around as they were so popular with the boys and visitors (not that they look any different to the rum variety)!
The first batch I made a while ago only had 1 teaspoon of peppermint essense which gave the balls a hint of a pepperminty taste so I decided to increase the amount to 1 1/2 teaspoons this time and was much happier with the overall flavour. I actually prefer choc-mint balls over traditional rum balls, they are dangerously moreish.
This latest batch was made the other night when my darling dog was staying overnight at the vet as I wanted to occupy myself with further cooking after dinner was finished. Jasper was so excited when we picked him up the next day, it was very hard not to be emotional but all of the material we read advised that we needed to stay positive for him. He was up on his three feet with his tail wagging madly and desperately trying to spread his kisses around as quickly as he could manage.
It is remarkable to watch him progress every day and become more confident and adjusted to getting around without his fourth limb. We initially assisted Jasper up and down our back steps but after a day he decided he wanted to tackle it by himself and now has worked out several different methods to suit his needs. After such a difficult decision, it is a huge relief to see that he is happy...
Choc-mint balls
250g packet Arnott's Nice biscuits
3 tablespoons cocoa
1/2 cup desiccated coconut
330g can Soymilke soy condensed milk
1 1/2 teaspoons peppermint essense
Extra desiccated coconut, for coating
Process biscuits in a food processor until they become a fine powder. Add the cocoa and 1/2 cup coconut to the food processor and pulse a few times. Transfer mixture to a bowl then add the soy condensed milk, peppermint essense and mix together until everything is well combined.
Place mixture in refrigerator for about 30 minutes to give it a firmer texture which makes it easier to roll the balls. If the mixture is too soft, it gets very sticky and difficult to roll properly and the balls will not hold their shape.
Put the extra coconut into a bowl. Roll spoonfuls of mixture into balls with your hands, and then coat in coconut. Store in an airtight container in the refrigerator.
Wednesday, February 2, 2011
Choc-Orange Muffins
When the batch of rum balls from a couple of weeks ago finally ran out it was time to make something else for the sweet tooths in the house. Muffins are something I have been baking a bit lately as they are larger than a cupcake, which is more satisfying for hungry boys and it doesn't seem to matter if you go the extra mile and finish them off with icing if you are pressed for time. Some of my recent muffins varieties have included Lemon Cranberry, Orange Cranberry as well as a favourite Chocolate Orange cake recipe that has also been converted into muffins. This is a lovely light recipe that doesn't make you feel too guilty about consuming them as there are no added fats (only sugar), and the light flavour of orange combined with chocolate is delicious.
Whilst preparing the mixture, I was thinking about the first time that I baked this cake after discovering it on Susan's blog - this was my first visit of many to her popular blog. It was mid last year and I was searching for something to bake for hubby's birthday and both chocolate and oranges had been in mind. Why oranges? Hang on a sec, there was even more behind the discovery of this recipe. Which lead me to a moment of sadness as I realised the first time I made this cake was the last time I was to utilise oranges from the prolific tree in our backyard...
The dear old tree used to be situated next to our shed and it was quite traumatic to pull it down to make way for our house extension. It wasn't our only backyard casualty however it was was the hardest to deal with. For years we had been provided with a bounty of oranges every winter and the tree had asked for so little in return. Very rarely was it watered, fed or maintained but it was so well established that it would keep on producing nonetheless. I'm sure that whenever I bake these muffins or the cake in the future I will always cherish the memory of our tree...
I tracked down a picture taken of the old darling on her last day alive :(
Choc-Orange Muffins (Adapted from Susan)
Makes 18-20 muffins
1 1/2 cups white flour
1 1/2 cups wholemeal flour
1 1/2 cups raw sugar
2 teaspoons baking soda
1 teaspoon baking powder (This was an addition to make them rise more as per other muffin recipes)
1 teaspoon salt
1/2 cup cocoa
1 teaspoon cinnamon
3/4 cup soy milk (Susan uses soy yoghurt which I never have on hand, soy milk works fine for me)
1 teaspoon vanilla essence
2 tablespoons balsamic vinegar
1 1/2 cups water
1/2 cup fresh orange juice
2 tablespoons grated orange zest
1 cup icing sugar
1 teaspoon vanilla essence
2 teaspoons orange juice (more as required)
Preheat oven to 180C.
Place the white flour, wholemeal flour, raw sugar, baking soda, baking powder, salt, cocoa, and cinnamon in a large bowl and mix until combined. Mix the soy milk, vanilla essence, balsamic vinegar, water, orange juice and zest in a smaller bowl. Add the wet ingredients to the dry and beat by hand or with a mixer on low speed until well combined.
Place muffin sized papers in a muffin tray and fill each paper about 3/4 full. Bake for about 25 minutes, or until a small skewer comes out clean.
For the icing, place a cup of icing sugar in a bowl. Add a teaspoon of vanilla essence and 2 teaspoons of orange juice. Mix until combined and add additional orange juice slowly until the icing reaches a smooth consistency.
Subscribe to:
Posts (Atom)